
Something New in My Stash
My Time To Craft Inspirational Post

Good day, fellow crafters. I am thrilled to introduce my inspirational submission for the My Time To Craft Challenge Blog, challenge #525, “Something New in My Stash” theme. I chose to use a Woodware stamp that I had never used before as my inspiration as well as a Sizzix embossing folder that was still sealed in the back of my collections.
For every challenge we, as the design team, attempt to bring you themes and ideas that will test your abilities and, ideally, ignite your enthusiasm to explore fresh ways of thinking. However, what I like most about being part of the team is seeing how we each showcase our take on the theme and sometimes just what the card means to the creator.
I hope you are inspired to enter this challenge and I can’t wait to see your creative take on this week’s theme. Be sure to tag me on your entry and/or comment below so I know to watch out for you. Remember Crafting is Happiness!


To create the background panel for this card I first began with a piece of previously created background paper. I have a near zero waste policy in my craft room and since this piece was so pretty I had to be sure to use it up. I took the paper and loaded it into my Misti stamping tool, aligned the Woodware Bold Blooms stamp, and inked and stamped the image. I don’t have a die for this set so I next removed it from the Misti and fussy cut the image out. I then set the piece aside.
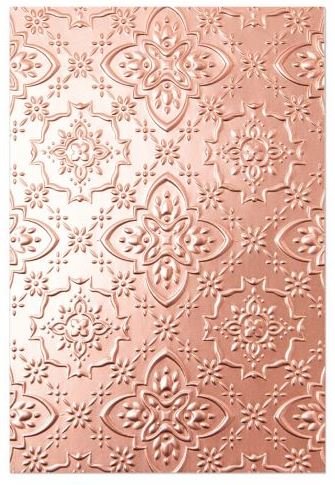
The next step was to create the background panel. For this, I opted to use the Sizzix Ornamental 3D Embossing folder I mentioned, featured below right. I chose a very pretty purple cardstock, misted the back of the paper to moisten the paper fibers, and then ran it through my Gemini die-cutting machine a couple of times to get a nice clean transfer.
I then turned to my Hero Arts rectangular nesting die set, to first cut the background panel down to its final dimensions and then I followed that up with a slightly larger die and some black cardstock to cut out a mat. I then used double-sided tape to adhere the background panel to the mat and then repeated the process to adhere the composite to a white card base. Using Barely Art liquid glue to adhere it to the background I attached my focal image.
The last step was to use a sentiment from the Woodware set, VersaMark watermark ink, and WoW! Black embossing powder to create a sentiment. I then adhered it to the card with more liquid glue and some pop dots for dimension. With that, I called the card complete.
Note: Please be aware that I don't have any sponsorship arrangements with the suppliers mentioned in this post; I simply appreciate and frequently use their products. To support the creation of more content like this, I've included affiliate links for some of the featured supplies. Utilizing these links won't incur any additional costs for you, but it does provide a small benefit to me, allowing me to continue sharing my work with you.
