

My Time to Craft Challenge Blog Inspirational Post -2025
Inspirational Post #556
Good day, fellow crafters. Today I am sharing my submission as part of the DT for My Time To Craft Challenge Blog. This time we are working on challenge # 556, with the theme of "celebrate someone". As it is getting closer to the Easter season I thought this one to be appropriate.
This card was created with the Winter Cross stamp from @coloradocraftcompany and was watercolored by hand.

Inspirational Post #555
Good day, fellow crafters. Today I am sharing my DT submission to the My Time To Craft Challenge blog. This time our theme, for challenge # 555 is Shamrock/Clover. This little mouse was too cute not to use in my project. Please consider playing along with us, we would love to see your work.

Inspirational Post #554
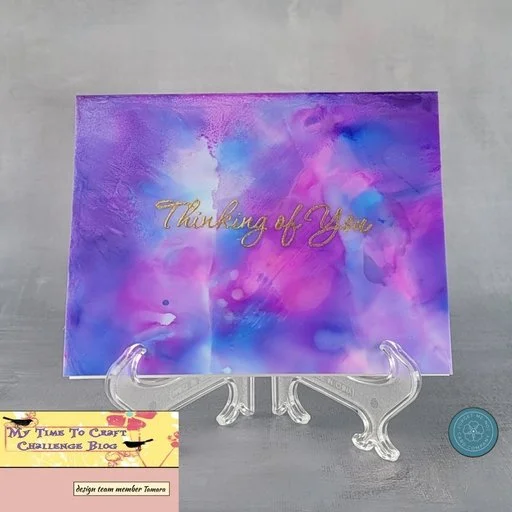
Good day, fellow crafters. Today I am sharing my inspiration post for the My Time to Craft Challenge Blog # 554. This time our theme is - 1,2,3 - This is referring to groups of elements. In my case I went with 1 sentiment, 2 pieces of cardstock, and 3 colors of ink. The unique thing about this challenge is that you can interrupt it in many ways. Be sure to head over to our page and see all the ways other crafters have created with this theme.
Inspirational Post #553
Good day, fellow crafters. Today I am sharing my inspirational post as part of the My Time To Craft Challenge Blog DT. Our challenges are always fun and open to all skill levels. Our theme for challenge # 553 is "Hearts". I hope you will be inspired to participate.

Inspirational Post #552
Good day, fellow crafters. Today I am sharing my inspirational post as part of the My Time TO Craft DT. This time for challenge # 552, we are creating masculine cards. I had this Big Foot die in my stash and just had to use it. Please check out the My Time To Craft Challenge blog and submit your best masculine card to the challenge.

To create this card, I began with some white Hammermill cardstock that I ink blended my sky and the setting sun. I can’t tell you the exact colors I used as the ink that was used was the left-overs that were on my various brushes. I have a zero waste policy in my craft room so I make sure to use up any and all ink before I add more to a brush.
The next step was to use various colored cardstock for the trees, the grass and the big man himself. All of the dies I used are from This Calls for Confetti. Once they were cut out I did a little distressing and then layered them to create the forest, add Bigfoot, and then add the grass in front of him. I then trimmed the card down to give a 1/8” reveal all around and mounted it to a white A2 card base.
The last step was to add the sentiment. This was doing using VersaMark watermark ink and white embossing powder which of course was heat set. With that I called this card complete.
I hope that you have been inspired and want to join us in this challenge too.